

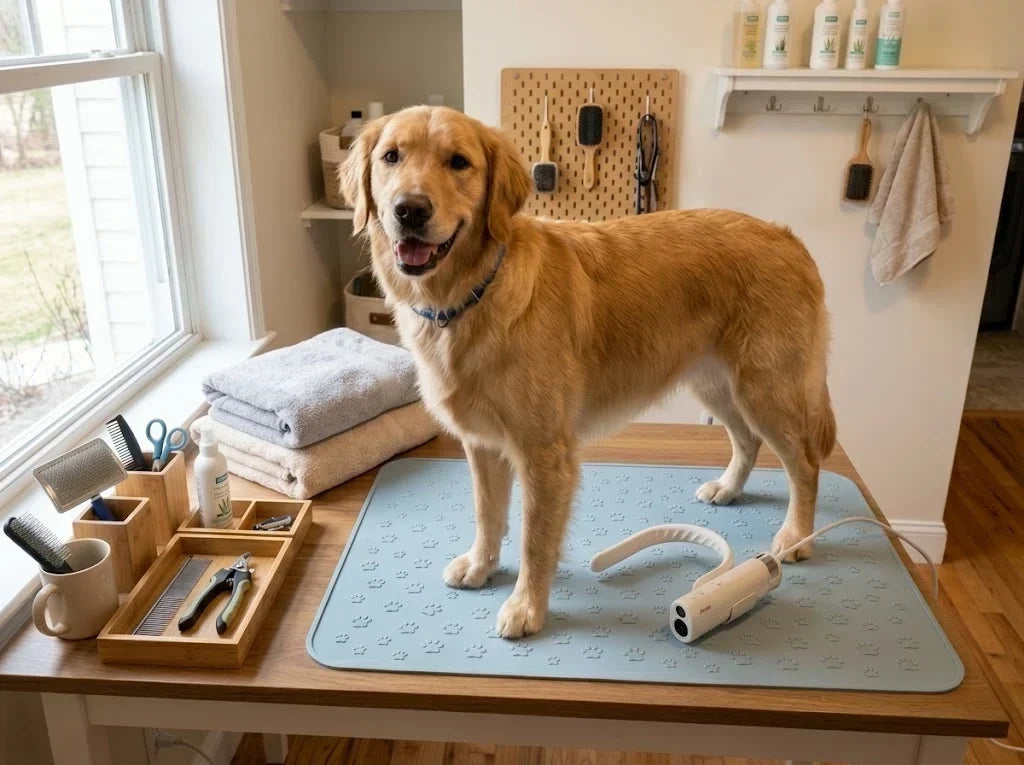
Grooming your dog at home helps keep their coat, skin, nails, ears, and paws clean and healthy. This guide covers the basics of at-home grooming for different coat types, from routine brushing and bathing to drying, nail care, and coat maintenance. It is suitable for most healthy dogs, but professional or veterinary help may be needed for severe mats, skin problems, or highly anxious behavior.
Grooming Your Dog at Home (Quick Overview)
1. Prepare your dog and grooming tools in a calm, safe, and comfortable area.
2. Brush the coat to remove loose hair, dirt, and minor tangles before bathing.
3. Check the skin, paws, ears, and coat for irritation, parasites, wounds, or painful mats.
4. Bathe your dog with lukewarm water and a dog-safe shampoo suited to their skin and coat.
5. Rinse the coat thoroughly until no shampoo residue remains.
6. Dry your dog completely with towels and appropriate pet-drying equipment.
7. Finish routine care by checking the nails, cleaning the ears when necessary, and brushing the coat into shape.
8. Reward your dog with calm praise or a treat so future grooming sessions feel more positive.
The exact grooming routine and frequency depend on your dog’s coat type, breed, lifestyle, age, and health.
What Dog Grooming Includes

Grooming your dog at home is the routine care that keeps your dog’s coat, skin, nails, ears, teeth, and other hygiene-sensitive areas clean and healthy. It is more than giving your dog a bath or scheduling a haircut. A complete grooming routine may include:
· Brushing and combing the coat
· Bathing with a dog-safe shampoo
· Drying the coat thoroughly
· Trimming or clipping the coat when needed
· Checking and trimming the nails
· Cleaning the ears
· Cleaning around the eyes and mouth
· Inspecting the skin for unusual lumps, redness, parasites, or irritation
The right grooming routine depends on your dog’s breed, coat type, age, lifestyle, and health. A long-haired dog may need frequent brushing and coat maintenance, while a short-haired dog may need less coat care but still requires regular nail, ear, dental, and skin checks.
Home grooming can handle many routine tasks, but severe mats, skin problems, fearful behavior, and specialized haircuts may require a professional groomer or veterinarian.
Why Regular Grooming Matters
Regular grooming helps you catch problems before they become serious. According to Preventive Vet, ear infections are among the most common reasons dogs visit a veterinarian, accounting for approximately 7.5% to 16.5% of visits in general-practice clinics. That’s why grooming isn’t just about appearance — it’s your first line of defense.
Regular grooming supports your dog’s health in several important ways:
· Supports skin health: Grooming helps you notice redness, swelling, parasites, unusual lumps, dryness, or other changes that may need veterinary attention.
· Reduces matting: Regular coat care helps prevent mats from pulling on the skin, trapping moisture, and causing discomfort.
· Maintains the coat: Grooming removes dirt, debris, and loose hair while helping the coat stay clean and manageable.
· Helps control shedding: Brushing removes loose hair before it spreads throughout your home or collects in the coat.
· Improves early issue detection: Routine handling makes it easier to notice changes in your dog’s paws, nails, ears, eyes, skin, and overall condition.
· Supports comfort and mobility: Keeping the coat, nails, and hygiene-sensitive areas in good condition can help your dog move and rest more comfortably.
The goal of regular grooming is not to make every dog look professionally styled. It is to maintain a healthy coat and make small changes easier to recognize before they develop into larger problems. That’s why grooming your dog at home isn’t just about appearance — it’s also an important part of routine health care.
What Kind of Grooming Does Your Dog Need?

The right grooming plan depends on your dog’s coat, age, and behavior. Identify your dog’s main grooming category first, then choose the appropriate tools, frequency, and level of professional support.
|
Dog Type |
Main Grooming Need |
What to Watch For |
|
Short-haired dogs |
Regular brushing, shedding control, bathing, nail care, and skin checks |
Less matting, but still check for loose hair, skin irritation, parasites, and lumps |
|
Long-haired dogs |
Frequent brushing, coat maintenance, mat prevention, and professional trims |
Tangles form easily behind the ears, under the legs, around the belly, tail, and paws |
|
Double-coated dogs |
Undercoat care, seasonal shedding control, and thorough drying |
Do not shave the coat for routine shedding control; trapped moisture can stay close to the skin |
|
Puppies |
Short, positive grooming sessions that build comfort with handling |
Focus on brushing, bathing, drying, paw handling, nail care, and routine checks |
|
Nervous or hyper dogs |
Slower sessions, calm handling, breaks, and possible professional support |
Stop if the dog shows persistent fear, aggression, pain, or extreme resistance |
This section helps you choose the right grooming approach before starting. The detailed grooming process, drying methods, nail care, ear cleaning, and coat-specific routines are covered in the sections below.
What Tools You Need to Groom a Dog at Home
Grooming your dog at home starts with having the right tools ready.
Before you start, gather the tools that match your dog’s coat type and the grooming tasks planned for that session.
|
Tool |
What It’s For |
Best Used For |
|
Slicker brush |
Removes loose fur and surface tangles |
Brushing before bathing; long-haired, curly, and double-coated dogs |
|
Grooming comb |
Checks for hidden mats after brushing |
Finding tangles close to the skin |
|
Dog-safe shampoo |
Cleans the coat without disrupting a dog’s skin pH |
Bathing at home |
|
Absorbent towels |
Removes surface water before drying |
First-pass drying after a bath |
|
Pet dryer or dog drying cabinet |
Helps dry the coat completely |
Long-haired, double-coated, small, or nervous dogs |
|
Nail clippers or nail grinder |
Shortens nails safely |
Routine nail care |
|
Dog-safe ear cleaner |
Helps remove wax and debris |
Routine ear cleaning when needed |
|
Cotton pads or soft gauze |
Applies ear cleaner and wipes visible debris |
Cleaning the outer ear and visible ear canal |
|
Styptic powder |
Helps stop minor bleeding if the quick is nicked |
Nail trimming safety |
You do not need every tool for every grooming session. Choose additional items based on your dog’s coat and comfort needs:
· Non-slip grooming mat — helps keep your dog stable and may reduce stress
· Detangling spray — for long-haired or curly-coated dogs
· Treats — for positive reinforcement throughout the session
How to Groom Your Dog at Home
The recommended order for grooming a dog at home is to brush first, bathe with dog-safe products, dry the coat completely, and finish with fur trimming, nail care, and ear cleaning. This order helps prevent loose fur and tangles from becoming harder to manage and ensures that finishing tasks are performed on a clean, fully dry coat.
Brush Your Dog Before Bathing
Always brush your dog before getting the coat wet. Brushing a dry coat is faster and more effective because water can cause existing tangles to tighten, turning a manageable knot into a mat that is more difficult and uncomfortable to remove.
Work through the coat section by section, beginning around the neck and gradually moving toward the tail. Use gentle, even strokes and check friction areas carefully, including behind the ears, under the armpits, around the collar, along the belly, and between the legs.
When you encounter a tangle, do not pull forcefully from the ends. Hold the fur close to the skin to reduce tension, then work through the tangle gradually. If the mat is tight, extensive, or close to the skin, stop and seek professional help rather than cutting into it with household scissors.
Bathe Your Dog Properly
Use lukewarm water that feels close to body temperature, generally around 37 to 38°C (98.6 to 100.4°F). Water that is too hot can irritate or burn the skin, while water that is too cold may make your dog uncomfortable and increase stress during the bath.
Wet the coat thoroughly before applying shampoo, starting at the neck and working toward the tail. Use a shampoo formulated specifically for dogs, since human shampoos may not be suitable for canine skin. Massage the product gently through the coat without scrubbing aggressively or creating unnecessary tangles.
Keep shampoo, water, and suds away from the eyes and inside of the ears. Rinse the coat carefully until the water runs clear and no slippery residue remains. Shampoo left on the skin can contribute to post-bath itching, dryness, and irritation.
Choose the Right Dog-Drying Method
Drying is an essential part of grooming, not an optional finishing step. A coat may feel dry on the surface while still holding moisture close to the skin, particularly in long-haired and double-coated dogs. Prolonged dampness can contribute to discomfort, odor, matting, and skin irritation.
Begin with an absorbent towel to remove surface water. Avoid vigorous rubbing, which can create tangles in longer coats. Follow with a suitable pet dryer or drying cabinet to help reach moisture beneath the outer coat and around dense areas.
Air drying may be adequate for some short-haired dogs in suitable conditions, but it is often insufficient for long-haired, thick-coated, or double-coated dogs. Drying equipment can provide more consistent results when used in a calm, controlled environment and according to the dog’s tolerance.
For small dogs or a more controlled home-drying setup, the Jirpet F1 pet dryer cabinet provides a stable, hands-free drying environment. For grooming salons or sessions that require both hands for handling and styling, the Jirpet Harmony I pet neck dryer helps maintain directed airflow while keeping the groomer’s hands available.

Trim Fur, Nails, and Clean Ears
Once the coat is clean and fully dry, move on to any necessary finishing care. Depending on your dog’s needs, this may include trimming overgrown fur around the paws, face, or sanitary areas, clipping or grinding the nails, and cleaning the outer ear area with a dog-safe solution.
These tasks should be treated as separate grooming activities because each has its own technique, safety considerations, and common mistakes. Detailed instructions are covered in the dedicated sections below.
How to Dry a Dog Completely

A dog must be dried completely after bathing because moisture trapped close to the skin can contribute to hot spots, odor, matting, and skin irritation. This risk is higher in long-haired and double-coated dogs, where the outer coat may feel dry while the undercoat remains damp.
Use the method that best suits your dog’s coat, size, and comfort level:
|
Drying method |
Speed |
Comfort |
Best for |
|
Towel drying |
Slow to moderate |
Usually comfortable |
Removing surface water and drying short-haired dogs |
|
Blow drying |
Moderate to fast |
Depends on noise, heat, and airflow |
Reaching moisture beneath the outer coat |
|
Dryer cabinet |
Consistent and hands-free |
Controlled environment |
Small dogs and dogs that tolerate enclosed drying |
For most dogs, towel drying should be the first step, not the only drying method.
Start by pressing an absorbent towel against the coat to remove excess water. Avoid vigorous rubbing, which can create tangles in longer coats. If using a dryer, choose a comfortable temperature and airflow, keep the nozzle moving, and check the skin regularly for heat or irritation.
Air drying alone may be sufficient for some short-haired dogs in suitable conditions, but it is often unreliable for long-haired, thick-coated, or double-coated dogs. Check the areas close to the skin, beneath the neck, behind the ears, under the legs, and around the belly before considering the grooming session complete.
For a complete drying routine, including coat-specific techniques and safety checks, continue with the steps below.
How to Trim Dog Nails Safely
Nail trimming is one of the most commonly avoided parts of at-home grooming, but overgrown nails can affect how a dog stands and walks. Long nails may change paw position, catch on surfaces, split, or curl toward the paw pad. Regular trimming keeps the nails manageable and helps your dog become more comfortable with the process over time.
How to Use a Dog Nail Clipper
Before trimming, check whether the nails are too long. Nails that click on hard floors when your dog walks, touch the ground while the dog is standing naturally, or visibly curl away from the paw may need attention.
The quick is the living inner part of the nail that contains blood vessels and nerves. On light-colored nails, it may be visible as a pink area. Leave a small margin before the quick rather than cutting directly up to it. On dark nails, the quick is harder to see, so remove the nail gradually in small slices.
Follow these steps:
1. Prepare the area. Place your dog on a stable, non-slip surface and keep the correct-size nail clipper, treats, and styptic powder within reach.
2. Hold the paw gently. Support one toe at a time, with your thumb beneath the paw pad and your fingers resting on top. Use enough pressure to keep the paw steady without squeezing it.
3. Cut at a slight angle. Remove only a small section of the nail at a time instead of making one large cut.
4. Check the cut surface. With dark nails, the center may look pale or chalky at first. As you approach the quick, a darker, moist-looking dot may appear in the center. Stop before cutting into it.
5. Trim every relevant nail. Check the front and back paws, including the dewclaws if your dog has them. Dewclaws do not usually contact the ground and can become overgrown more easily.
6. Reward cooperation. Give calm praise or a treat after each nail, and pause if your dog becomes distressed.
You do not have to finish all four paws in one session. If your dog resists, trim one or two nails at a time and gradually build tolerance. For very long nails, regular small trims may allow the quick to recede gradually. Do not force the paw or continue if your dog shows signs of pain, panic, or aggression.
What to Do If You Cut the Quick
Cutting the quick can cause temporary bleeding, even when the mistake is minor. Stay calm, because sudden reactions can make your dog more fearful of future nail trimming.
Apply styptic powder directly to the cut end of the nail and hold gentle, steady pressure for approximately 30 to 60 seconds. Styptic powder contains an ingredient that helps promote clotting. If it is unavailable, cornstarch can serve as a short-term alternative for minor bleeding.
After the bleeding stops, keep the paw clean and dry for a short period and avoid rough outdoor surfaces until the nail is less sensitive. Do not continue trimming the injured nail during that session.
Contact your veterinarian if bleeding continues after several minutes of steady pressure, the nail is split or badly damaged, or your dog shows persistent pain, swelling, or difficulty walking.
How to Clean Your Dog’s Ears Safely
Regular ear checks help you notice wax buildup, excess moisture, irritation, or other changes early. Many dogs can be checked and cleaned every two to four weeks, but there is no universal schedule. Dogs that swim often, have floppy ears, grow dense ear hair, or have a history of ear problems may need more frequent care based on veterinary advice.
Before cleaning, inspect both ears. A healthy ear is usually pale pink, has little visible wax, and has no strong odor. Do not continue with routine home cleaning if you notice redness, swelling, heat, pain, a strong smell, dark or yellow discharge, bleeding, repeated head shaking, or persistent scratching at one ear. These signs may indicate an active ear problem, and cleaning without professional guidance can worsen irritation or push debris deeper.
What You Need
· Dog-safe ear-cleaning solution
· Cotton pads or soft gauze
· Treats for positive reinforcement
Never use cotton swabs inside the ear canal. Also avoid alcohol, hydrogen peroxide, essential oils, and solutions not formulated for dogs, as these may irritate sensitive ear tissue or damage the ear if the eardrum is not intact.
Follow these steps:
1. Apply the ear-cleaning solution. Place the recommended amount into the ear canal or onto a cotton pad, according to the product instructions. Do not force the bottle tip deep into the ear or touch it against the ear tissue.
2. Massage the base of the ear. Gently massage the area where the ear meets the head for approximately 20 to 30 seconds. A soft squelching sound may indicate that the solution is loosening wax and debris.
3. Let your dog shake. Step back and allow your dog to shake their head. This helps move loosened material toward the outer opening of the ear.
4. Wipe the visible areas. Use a cotton pad or soft gauze to clean the inner ear flap and the visible entrance of the ear canal. Only wipe areas you can see easily.
5. Use a fresh pad for the other ear. Repeat the process on the opposite side with clean gauze or a new cotton pad.
Do not insert anything farther into the ear canal than you can see. A dog’s ear canal has an L-shaped structure, so pushing a cotton swab or other object inward can compact debris, cause injury, or make the ear harder to examine. Stop if your dog shows pain, sudden resistance, or significant distress.
How to Clean a Puppy’s Ears Safely
Puppies often have less visible wax than adult dogs, so deep cleaning is rarely necessary unless a veterinarian recommends it. The main goal is habituation: help your puppy become comfortable with having the ears touched before regular grooming becomes necessary.
Begin by gently touching the outer ear and rewarding calm behavior. When your puppy accepts this, use a small amount of dog-safe ear cleaner on a cotton pad and wipe only the visible inner surface of the ear flap. Keep the session brief, use a calm voice, and offer a treat afterward.
A puppy’s ears can usually be checked every two to four weeks or whenever visible dirt appears, but the timing should follow the puppy’s individual needs and veterinary advice. Do not put solution directly into a puppy’s ear canal unless a veterinarian has instructed you to do so. If the ear smells unusual, looks inflamed, produces discharge, or causes your puppy to scratch or shake their head, arrange a veterinary examination.
When Ear Hair Removal Is Needed
Some breeds, including Poodles, Schnauzers, and Bichon Frises, may grow noticeable hair inside or around the ear canal. Dense hair can trap moisture and debris, but ear hair is not automatically a problem and does not need to be removed from every dog.
For many dogs, routine ear-hair removal is unnecessary. Whether removal is appropriate depends on the individual dog’s ear anatomy, the density of the hair, moisture retention, and history of recurring ear problems. Ask your veterinarian or professional groomer for guidance before removing hair.
If removal is recommended, professional care is usually the safest option. Pulling or cutting too aggressively at home can create small abrasions and inflammation inside the ear, increasing discomfort and potentially raising the risk of further problems. Never remove hair from an ear that is painful, swollen, foul-smelling, or producing discharge before the underlying issue has been evaluated.
How to Groom Different Coat Types
Different coat types need different grooming routines. Use the schedule below as a starting point, then adjust it for your dog’s shedding cycle, activity level, lifestyle, skin condition, and tendency to develop tangles.
|
Coat type |
Brushing |
Bathing |
Professional grooming |
|
Short-haired |
About once a week |
Every 2–3 months, or when needed |
Every 8–12 weeks, if needed |
|
Long-haired |
Daily or every other day |
Every 2–4 weeks, or when needed |
Every 4–6 weeks, if a trim is needed |
|
Double-coated |
2–3 times a week; daily during heavy shedding |
About every 6–8 weeks, or when needed |
Every 8–12 weeks, if needed |
These are general intervals, not strict rules. A dog that swims, spends time outdoors, rolls in dirt, or has a veterinarian-recommended skin-care routine may need a different schedule.
How to Groom a Short-Haired Dog
Short-haired dogs are generally the lowest-maintenance coat type, but they still shed, accumulate skin oils, and need regular skin checks. Because the coat is close to the skin, routine grooming is also a useful opportunity to notice redness, dry patches, parasites, unusual lumps, or areas of tenderness.
The main grooming priorities for short-haired dogs are:
· Shedding control: Use a rubber grooming mitt, curry brush, or soft bristle brush to lift loose hair without irritating the skin. Weekly brushing is usually sufficient outside periods of heavier shedding.
· Skin checks: Run your hands over the coat and inspect the skin during brushing. Look for redness, scaling, bald patches, bumps, fleas, ticks, or changes that were not present before.
· Bathing: Most short-haired dogs do not need frequent baths. Bathing every two to three months may be enough unless the dog becomes dirty, swims regularly, develops an odor, or has a veterinary skin-care plan.
· Comfort-focused care: Short hair does not eliminate the need for nail, ear, paw, and dental care. These areas should be checked as part of the dog’s overall grooming routine.
How to Groom a Long-Haired Dog
Long-haired dogs require the most consistent coat maintenance of the three main coat types. Tangles can form quickly in friction areas, especially behind the ears, under the armpits, around the collar, across the belly, between the hind legs, and around the tail.
The main grooming priorities for long-haired dogs are:
· Frequent brushing: Brush the coat section by section with a slicker brush, then use a grooming comb to check for tangles close to the skin. If the comb passes smoothly from the skin outward, the section is probably free of hidden mats.
· Tangle prevention: Do not wait until the coat is visibly matted. Small tangles are easier and more comfortable to remove than dense mats that pull on the skin.
· Bathing: Many long-haired dogs can be bathed every two to four weeks when necessary, but the ideal interval depends on the coat and lifestyle. Brush out manageable tangles before bathing because wet tangles can tighten.
· Professional grooming: Dogs that need regular trims may benefit from professional grooming every four to six weeks. The exact schedule depends on the desired coat length, breed pattern, and rate of hair growth.
· Complete drying: Long coats can hold moisture close to the skin after the surface feels dry. Dry through the coat rather than checking only the outer layer, particularly around the ears, neck, belly, legs, and armpits.
How to Groom a Double-Coated Dog
Double-coated breeds, including Huskies, Golden Retrievers, German Shepherds, and Corgis, have a dense undercoat beneath a longer protective topcoat. These layers serve different functions, so grooming must remove loose undercoat while preserving the coat’s natural structure.
The main grooming priorities for double-coated dogs are:
· Brush through both layers: A slicker brush can help separate and lift loose hair from the topcoat, while an undercoat rake or suitable de-shedding tool can reach the dense undercoat. Use tools appropriate for the individual coat and avoid aggressive scraping against the skin.
· Increase brushing during shedding season: Many double-coated dogs shed heavily during seasonal coat changes, often in spring and fall. During these periods, brushing may need to increase from several times a week to daily, depending on how much loose undercoat is being released.
· Do not shave the coat for routine maintenance: Shaving a double-coated dog can remove the protective topcoat, increase the risk of sun exposure, and cause the coat to grow back unevenly or change texture. Exceptions may apply for medical treatment or severe matting, and these decisions should be made with a veterinarian or professional groomer.
· Bathe only as needed: A bath every six to eight weeks may suit some double-coated dogs, but frequency should reflect the dog’s lifestyle, coat condition, and skin needs. Over-bathing can dry or irritate the skin.
· Dry through the undercoat: Dense undercoats can retain moisture against the skin for a long time. After bathing, the coat should be dried thoroughly rather than left damp beneath the outer layer. Watch for wet areas around the neck, chest, belly, legs, and behind the ears.
The best grooming routine is the one that keeps the coat manageable, the skin comfortable, and the dog calm enough to participate safely.
How to Deal with Mats, Tangles, and Shedding
Mats are a health and comfort problem, not merely a cosmetic issue. The ASPCA warns that matting can cause skin irritation and infected lesions; severe, neglected mats may hide fleas, ticks, wounds, or inflamed skin that require veterinary care.
A tight mat pulls on the skin whenever your dog moves. It can cause pain, trap moisture and debris, reduce airflow, and create conditions that worsen irritation or infection. Do not assume that a mat is harmless simply because the skin underneath is not visible.
Where mats form most often:
Mats commonly develop in areas exposed to friction, moisture, or frequent movement:
· Behind the ears
· Under the armpits
· Around the collar line
· Between the hind legs
· Around the tail
· Between or around the paw pads
· Under the belly and chest
Long-haired, curly-coated, and heavily feathered dogs are particularly prone to matting. Poodles, Doodles, Cocker Spaniels, Shih Tzus, and Golden Retrievers may need especially consistent coat checks because loose hair can become trapped within the surrounding coat instead of falling away.
How to Brush Mats Out of Dog Hair
Only attempt to loosen a mild or moderate mat when the coat is dry. Wet fur can tighten around a knot, and pulling through a damp mat may cause unnecessary pain.
Follow these steps:
1. Apply a dog-safe detangling spray. Work it into the mat and allow it to soften the outer hair for a short period, following the product instructions.
2. Protect the skin. Hold the base of the mat close to the skin with your fingers so the pulling force is not transferred directly to your dog’s skin.
3. Start at the outer edge. Use a wide-tooth comb or suitable dematting tool to loosen a few strands at a time, working gradually from the outside toward the center.
4. Separate the knot in small sections. Do not drag a comb from the roots through the entire mat in one motion. Stop if your dog shows pain or becomes distressed.
5. Smooth the coat afterward. Once the tangle is removed, use a slicker brush and then a comb to check that the surrounding coat is clear.
Never cut through a tight mat with household scissors. Severe mats can pull the skin upward into the knot, making it difficult to distinguish hair from skin. This creates a serious risk of cutting your dog.
Do not attempt to brush out mats that are dense, extensive, close to the skin, wet, foul-smelling, or associated with redness, wounds, swelling, or pain. A professional groomer can assess whether the coat should be clipped, while a veterinarian may need to examine skin that is damaged or infected.
Preventing mats is safer and more comfortable than removing them after they become dense. Consistency matters more than completing an occasional long grooming session.
Prevention checklist:
· Brush long-haired and curly-coated dogs daily or every other day, depending on the coat.
· Check behind the ears, under the armpits, around the collar, between the hind legs, and around the paws during every brushing session.
· Dry the coat thoroughly after bathing or swimming. Damp hair that dries while tangled is more likely to form mats.
· Remove or loosen manageable tangles before they become tight against the skin.
· Take off the collar periodically and inspect the fur underneath it.
· Keep professional grooming appointments on schedule when your dog needs regular trimming.
· Choose a coat length that fits your ability to maintain it at home.
Managing shedding:
Shedding and matting are related but different problems. In double-coated dogs, loose undercoat can become the material that forms mats when it is not removed regularly. Dead hair may tangle with the surrounding coat, compress, and trap additional hair, moisture, and debris.
During heavy shedding periods, brush more frequently and use a de-shedding tool that suits your dog’s coat. Avoid aggressive scraping or excessive de-shedding, which can irritate the skin or damage healthy coat. Professional de-shedding may be useful for heavy shedders, but it does not replace regular at-home brushing.
When to go to a professional:
Ask a professional groomer to assess the coat instead of attempting removal at home when:
· You cannot slide a comb between the mat and the skin.
· The mat is tight, dense, widespread, or located near a sensitive area.
· The skin beneath it appears red, wet, swollen, broken, or foul-smelling.
· Your dog reacts with pain, growling, snapping, or intense distress when touched.
· Multiple areas are severely matted.
· You cannot clearly tell where the mat ends and the skin begins.
A groomer may use professional clippers to remove a tight mat while reducing the risk of cutting the skin. If the matting hides wounds, parasites, significant inflammation, or an infection, veterinary care should come before or alongside grooming.
Common Dog Grooming Mistakes to Avoid
Even well-intentioned grooming can cause problems when key steps are skipped or performed incorrectly. These are the most common mistakes and the consequences they can create.
Bathing Without Brushing First
Putting a tangled coat into water can make the knots tighten. A manageable tangle before the bath may become a dense, painful mat after the coat gets wet.
Brush through the coat and loosen manageable tangles before bathing. If the coat contains tight mats, do not assume that shampoo will remove them. Have a professional groomer assess severe matting before washing.
Not Drying the Coat Completely
A coat that feels dry on the surface may still hold moisture close to the skin, especially in long-haired and double-coated dogs. Trapped moisture can contribute to discomfort, odor, matting, hot spots, and skin irritation.
Towel drying is useful for removing surface water, but it may not dry the coat to the roots. Follow with suitable pet-drying equipment when necessary, and check dense areas such as behind the ears, around the neck, under the legs, and across the belly.
Cutting the Nails Too Short
Cutting into the quick, the sensitive inner part of the nail containing blood vessels and nerves, causes pain and bleeding. A painful experience can also make your dog more resistant to future nail trims.
Remove only small amounts at a time and inspect the cut surface after each slice. When trimming dark nails, stop when the center begins to show a darker, moist-looking dot. Keep styptic powder nearby before you start in case minor bleeding occurs.
Forcing Through a Mat
Pulling a comb directly through a tight mat drags the skin beneath it and can cause significant pain. A dog that repeatedly experiences painful detangling may become fearful or resistant to future grooming.
For a mild tangle, work from the outer edges inward, hold the base of the mat close to the skin to reduce tension, and use a dog-safe detangling product if appropriate. If the mat will not loosen easily, do not reach for household scissors. Ask a professional groomer to remove it safely.
Using Human or Unsuitable Products
Human shampoos, conditioners, and ear products are not automatically suitable for dogs. Differences in skin structure and pH can make unsuitable products irritating, especially when a dog already has dry, sensitive, or inflamed skin.
Use products specifically formulated for dogs and follow the label instructions. If your dog has a diagnosed skin or ear condition, use only products recommended by your veterinarian.
Skipping Ear Checks Between Cleanings
Checking a dog’s ears is not the same as cleaning them. A brief inspection during grooming can reveal early signs of a problem, including redness, swelling, unusual odor, discharge, head shaking, or repeated scratching.
Do not clean an ear that looks painful or infected without veterinary guidance. Early assessment is safer than repeatedly applying cleaning solution to an ear that needs medical treatment.
Rushing or Restraining Too Forcefully
Grooming performed under intense stress can teach a dog that grooming is something to fear and resist. Forcing a struggling dog also increases the risk of accidental cuts, bites, falls, or other injuries.
Use short, calm sessions and reward cooperative behavior throughout. If your dog is shutting down, growling, snapping, or struggling continuously, stop and allow the dog to settle. An incomplete session is safer than forcing the procedure and making future grooming more difficult.
Dog Grooming Safety Tips
Safe grooming your dog at home starts with the right environment, calm handling, and knowing when a task is beyond home care. Use this checklist before, during, and after every grooming session.
Before grooming:
· Choose a quiet, well-lit area with a stable, non-slip surface.
· Prepare all tools before bringing your dog into the grooming area.
· Check that clippers, grinders, brushes, and dryers are clean and in good condition.
· Use products specifically formulated for dogs and follow their labels.
· Check the coat, skin, paws, ears, and nails for wounds, swelling, parasites, mats, or signs of pain.
· Keep treats and clean towels nearby to reward calm behavior and manage moisture.
· Make sure your dog is not already overheated, exhausted, ill, or highly distressed.
During grooming:
· Handle the paws, ears, tail, and sensitive areas gently.
· Keep scissors, clippers, and nail tools away from loose skin, eyes, and ear canals.
· Use lukewarm water and avoid directing water into the eyes or inside the ears.
· Keep dryers at a comfortable temperature and distance, and check the skin regularly for heat or irritation.
· Never leave a dog unattended on a grooming table, near water, or inside a drying enclosure.
· Take breaks when your dog becomes restless, tired, fearful, or unable to remain safely positioned.
· Use calm restraint only when necessary; never force a struggling dog through a procedure.
Stop the session if your dog:
· Shows persistent fear, panic, trembling, or attempts to escape.
· Growls, snaps, bites, or becomes unsafe to handle.
· Whines, flinches, pulls away, or shows other signs of pain.
· Develops bleeding, swelling, breathing difficulty, overheating, or severe skin irritation.
· Cannot remain still enough for safe nail, ear, coat, or face care.
Do not punish a dog for resisting grooming. Stop, give the dog space to settle, and reassess whether the task can be completed safely another day.
Choose a professional groomer when:
· Severe mats are tight against the skin or cover a large area.
· Your dog has a painful, inflamed, infected, or bleeding skin or ear condition.
· Your dog becomes aggressive or too fearful to handle safely.
· A specialized breed haircut or difficult sanitary trim is required.
· You are unsure how to use a clipper, grinder, dematting tool, or other grooming equipment.
· Your dog has a medical condition, mobility limitation, or other need that makes grooming more complicated.
Contact a veterinarian rather than relying on grooming alone when you notice persistent pain, open wounds, unusual discharge, a strong odor, unexplained hair loss, or sudden changes in your dog’s tolerance for handling. Safety takes priority over completing the grooming checklist.
When to Choose a Professional Groomer
Home grooming is suitable for many routine tasks, but professional help is the safer choice when the coat, behavior, or grooming task makes home care difficult to perform without risk.
|
Situation |
Home Grooming? |
Best Next Step |
|
Your dog is large or difficult to handle |
Sometimes |
Choose a groomer if safe handling requires special equipment, a grooming table, or more than one person |
|
The coat is severely matted |
No |
Book a professional groomer; do not cut tight mats with household scissors |
|
Your dog is highly anxious or reactive |
Usually no |
Work with an experienced groomer, and speak with a veterinarian if fear or aggression makes handling unsafe |
|
A complex haircut or breed-specific style is needed |
Not recommended |
Choose a professional for hand-scissoring, precise shaping, sanitary trims, and detailed coat styling |
|
Your dog has a thick, curly, or high-maintenance coat |
Often helpful |
Use professional grooming to prevent recurring mats and keep the coat manageable between appointments |
|
Your dog has a health or mobility concern |
Usually no |
Ask a veterinarian or professional groomer before grooming around painful joints, skin conditions, ear problems, or limited mobility |
|
You are unsure how to perform a task safely |
No |
Get professional help before attempting nail trimming, dematting, clipping, or ear care with unfamiliar tools |
Seek veterinary care rather than a grooming appointment if your dog has open wounds, severe skin inflammation, persistent pain, bloody or foul-smelling ear discharge, unexplained hair loss, or other signs of illness. A professional groomer can maintain the coat, but a veterinarian must diagnose and treat medical problems.
The best grooming plan combines regular home checks with professional care whenever your dog’s safety, comfort, or health requires additional support.
FAQ
What Is the Best Order to Groom a Dog?
The most effective grooming sequence is to prepare the tools, inspect the dog, brush the dry coat, bathe, dry thoroughly, and then complete nail, ear, and coat finishing. This order prevents tangles from tightening in water and makes it easier to assess the coat and skin once they are clean and dry.
Should I Bathe My Dog Before or After Grooming?
Brush and detangle your dog before the bath, but wait until the coat is clean and fully dry before doing any final trimming or shaping. Washing a tangled coat can tighten mats, while trimming a wet coat can produce an uneven result and make it harder to judge the true coat length.
How Often Should You Groom a Dog?
Most dogs need routine grooming every few weeks, but the ideal schedule depends on coat type, shedding, lifestyle, and health. Short-haired dogs may need less coat care, while long-haired or curly-coated dogs often need grooming more frequently.
How Often Should I Brush My Dog’s Coat?
Brush short-haired dogs about once a week, long-haired dogs daily or every other day, and double-coated dogs two or three times a week. Increase brushing during heavy shedding or whenever tangles begin to form.
Is It Easy to Groom Your Own Dog?
How Can I Groom My Dog at Home?
You can groom your dog at home by preparing a calm, non-slip space, brushing the coat before bathing, using a dog-safe shampoo, drying the coat completely, and finishing with nail trimming and ear cleaning. Start with short sessions, reward calm behavior, and contact a professional groomer for severe mats, anxious dogs, or complex haircuts.
Basic grooming tasks can be manageable at home when your dog is healthy, cooperative, and free of severe mats. Complex haircuts, tight matting, medical concerns, and highly anxious behavior are better handled by a professional groomer or veterinarian.
How Do I Groom a Nervous or Hyper Dog?
Use short sessions, a non-slip surface, calm handling, and treats for cooperation. Stop if your dog shows persistent fear, pain, or unsafe resistance, and consider professional or veterinary support.
How Long Does It Take to Groom a Dog at Home?
A basic session may take about 15 to 60 minutes, depending on your dog’s size, coat, temperament, and the tasks involved. Brushing, bathing, drying, nail care, and ear care may also be divided into shorter sessions.
Conclusion
Regular grooming isn’t a single task — it’s a routine that protects your dog’s skin, coat, and overall health over time.
If you’re just starting grooming your dog at home, the tools and equipment discussed above are a practical place to start.
If you’re setting up a home grooming routine for the first time, the tools and equipment discussed above are a practical place to start.
References
· O'Neill, D. et al. (2019). Epidemiology of ear infections in dogs under primary veterinary care in the UK. Royal Veterinary College (VetCompass). https://www.rvc.ac.uk/vetcompass/news/now-listen-ear-new-rvc-research-reveals-the-dog-breeds-most-affected-by-ear-infections
· VCA Animal Hospitals. (2026). Hot spots in dogs. https://vcahospitals.com/know-your-pet/hot-spots-in-dogs
· Rover. (2024). How often should I groom my dog? Experts explain. https://www.rover.com/blog/how-often-should-i-groom-my-dog/
ASPCA. (n.d.). A haircut could save a life: Preventing your pet's coat from matting. https://www.aspca.org/news/haircut-could-save-life-preventing-your-pets-coat-matting