

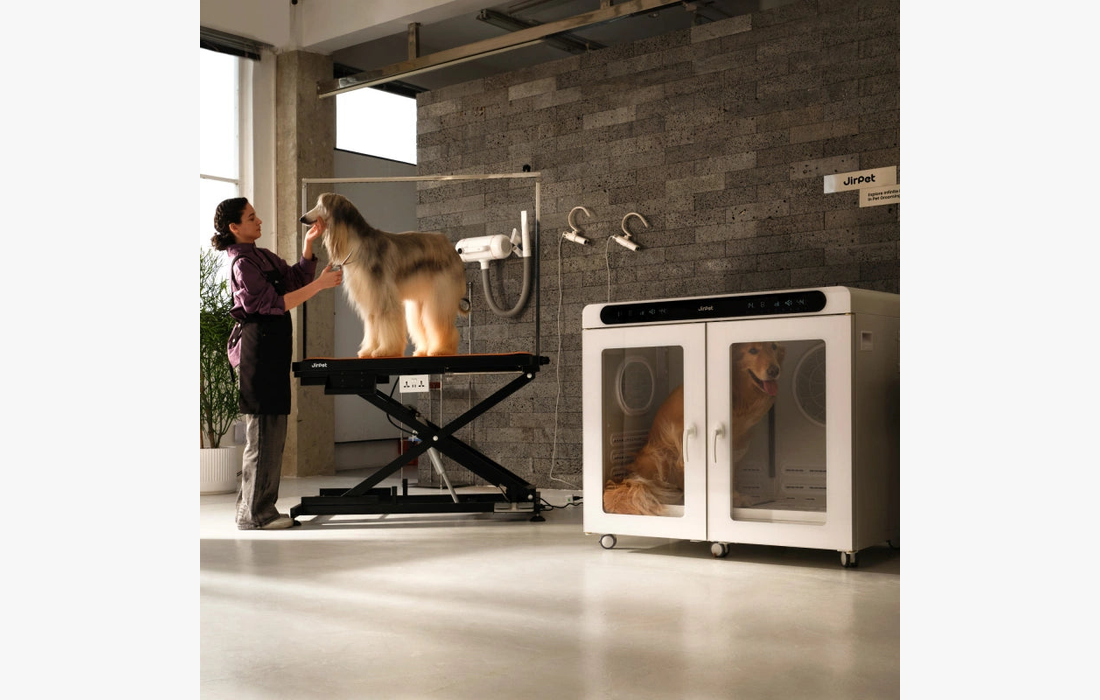
When comparing pet drying cabins, the temperature range is only part of the decision. You also need to know how the cabin moves moist air out, whether your pet has enough room, and what the equipment does when a fault occurs.
This guide explains those features using the Jirpet F1, C7S, and CPlus. It also covers the checks needed during use, so you can judge both the equipment and the care involved before buying.
Quick Answer: What Temperature Should a Pet Drying Cabin Be Set To?
There is no single temperature setting suitable for every dog or cat. Jirpet F1, C7S, and CPlus offer an adjustable range of 68–104°F (20–40°C), but the available range is not a recommendation for every pet. Follow the operating instructions for your unit, assess the animal’s health and tolerance, and monitor its condition throughout drying.
Jirpet F1, C7S, and CPlus: Key Controls
- Temperature settings: 68–104°F (20–40°C). This is the selectable range, not a recommended range for every pet.
- Four airflow levels. Let you adjust airflow during the session.
- Humidity-controlled exhaust. Uses humidity sensing to operate the exhaust vent and release moist air.
- A 1–99-minute timer. Sets the session length; it does not confirm that the coat is dry.
- Temperature monitoring. Monitors equipment conditions, while the operator checks the pet’s breathing, posture, and behavior.
What Does the Temperature Setting Actually Mean?
The temperature you select, the temperature detected inside the cabin, and the pet’s body temperature are different measurements.

| Temperature | What it tells you |
|---|---|
| Set temperature | The target selected on the control panel |
| Measured cabin temperature | The air temperature detected at the sensor’s location |
| Pet’s body temperature | The animal’s physiological temperature, which the cabin’s air sensor does not measure |
This distinction matters during use. A steady reading tells you about the air near a sensor. It does not tell you whether the pet is anxious, breathing comfortably, or ready to leave.
The highest available setting should not become the default simply because a coat is wet. Nor should a pet’s normal body temperature be used as a shortcut for selecting the surrounding air temperature.
For professional dog grooming, the AKC’s educational standards recommend low heat settings and moving airflow. Use that principle alongside the equipment instructions and an assessment of the individual animal.
If drying is taking longer than expected, check preparation and airflow before reaching for the temperature control.
How Airflow and Humidity Affect Drying
Drying depends on water leaving the coat and moist air leaving the drying space.
Thorough towel drying reduces the amount of water the equipment needs to remove. Moving air then supports evaporation. As moisture enters the surrounding air, ventilation carries it out of the cabin.
Jirpet F1, C7S, and CPlus use humidity sensing to control an exhaust vent. This removes moisture through air exchange rather than through a separate refrigerant dehumidifier.

C7S and CPlus also offer an airflow swing function. Changing the outlet direction helps distribute airflow, but it does not remove the need to check areas sheltered by the pet’s posture. The belly, underside, and dense coat sections can need extra attention.
When drying slows, work through these checks:
| What you notice | What to check |
|---|---|
| The coat is still very wet early in the session | Whether enough surface water was removed with towels |
| Airflow seems reduced | Filter buildup and obstructed inlet or exhaust openings |
| Some areas dry while others stay damp | The pet’s position and how air reaches those areas |
| The surface feels dry but the coat still feels damp underneath | Dense sections and moisture close to the skin |
A humidity reading describes the air, not the dryness of every part of the coat. Inspect the coat directly before moving on to finishing.
For preparation and finishing techniques, see our long-haired dog drying guide.
Comparing Temperature, Airflow, and Capacity Across Three Drying Cabins
The Jirpet F1 pet drying cabin, Jirpet C7S pet drying cabin, and Jirpet CPlus pet drying cabin share several control ranges. Their capacities differ, so the available space is an important part of the buying decision.

| Feature | F1 | C7S | CPlus |
|---|---|---|---|
| Adjustable temperature | 68–104°F / 20–40°C | 68–104°F / 20–40°C | 68–104°F / 20–40°C |
| Airflow settings | 4 levels | 4 levels | 4 levels |
| Timer range | 1–99 minutes | 1–99 minutes | 1–99 minutes |
| Listed capacity | 75 L | 170 L | 405 L |
| Humidity-controlled exhaust | Yes | Yes | Yes |
The F1, C7S, and CPlus share the temperature range, airflow levels, and timer range shown above. Those settings alone will not tell you which model fits your needs. Their listed capacities—75 L, 170 L, and 405 L—are a starting point for comparing space.
Before choosing, compare the usable internal dimensions with the pet’s standing height, body length, and room needed to turn. If you plan to use a divided configuration, check the dimensions of each compartment. Total cabin volume does not show how much room an individual pet will have.
Use the product links above to check internal and external dimensions, electrical requirements, and the configuration you intend to order.
AKC guidance for enclosure drying calls for one pet per kennel with an air mover and enough room to sit comfortably, stand, and turn around. A larger cabin should not be treated as permission to crowd animals together. Read the guidance.
Check the installation before ordering. Allow room for doors to open, staff to reach the pet, and ventilation openings to remain clear. Confirm the power supply required by the exact unit.
Compare cabin time and hands-on time separately. When asking for a drying demonstration, choose a pet with a similar size and coat to those you usually handle. Ask how thoroughly the coat was towel dried, which settings were used, and whether brushing or additional drying was needed afterward.
Record both the time spent in the cabin and the staff time spent preparing, monitoring, cleaning, and finishing. A shorter cabin cycle does not necessarily mean less work across the whole appointment, and a higher power rating alone does not prove faster drying.
Video: Jirpet F1 Pet Drying Cabin Overview
Temperature Monitoring and Protective Features
Temperature control manages normal operation. Fault protection responds when the equipment detects an abnormal condition. When comparing cabins, ask about both.
The illustration below shows the Jirpet F1’s internal protection components. Refer to the specifications for the model you are considering when comparing protective features.

A useful product explanation should tell you what the unit monitors, what triggers an alarm, and what happens next. “Overheat protection” on its own does not explain whether a fault stops heating, airflow, or the entire machine.
Before buying, confirm:
- Temperature sensing: What is monitored, and how does the unit respond to a sensor fault?
- Alarm behavior: What will the operator see or hear?
- Protective response: Which functions stop when a fault is detected?
- Timer completion: What happens when the countdown ends?
- Fault recovery: When can the unit be restarted, and when is service required?
These answers also help with staff training. The person using the cabin should recognize the difference between a completed session and a fault warning.
Equipment protection does not assess a pet’s comfort. If the animal becomes distressed, respond to the animal rather than waiting for the machine to signal a problem.
Before, During, and After a Drying Session
A repeatable routine helps staff spot problems early and makes responsibility clear when more than one person works in the drying area.
| Stage | Practical checks |
|---|---|
| Before loading | Review health and behavioral concerns. Check that the cabin is clean, the pet can move comfortably, and the door is readily accessible. |
| Before starting | Towel dry thoroughly. Check filters and ventilation openings. Select settings according to the unit’s instructions and the individual assessment. |
| During drying | Assign someone to observe breathing, posture, and behavior. Inspect the coat and respond if the pet becomes uncomfortable. |
| At the end | Remove the pet promptly. Check dense areas and the underside, then complete any necessary brushing or additional drying under supervision. |
| Between appointments | Remove collected hair and clean the equipment as directed. Unplug before cleaning or maintenance. |
Keep ventilation openings clear of walls, towels, storage bins, and nearby furniture. Follow the clearance requirements for the model you install, including after moving it to a different position.
Do not assume that a timer reaching zero means the entire coat is dry. Equally, there is no reason to keep a pet inside until the countdown ends if the session needs to stop earlier.
For salon records, note the settings, time in the cabin, the pet’s response, and any additional drying required. Those observations can help plan the next appointment, but the pet’s condition should be reassessed each time.
When calculating staff capacity, include supervision, cleaning, and coat finishing. Our pet force dryer vs drying cabin guide explains how those tasks affect an equipment upgrade decision.
Which Pets Need Individual Assessment?
Before choosing a temperature or timer setting, consider whether the pet is a suitable candidate for cabin drying. Health history, mobility, and tolerance of an enclosed space all matter. A pet that fits inside the cabin may still need a different drying approach.
Short-nosed pets, older animals, overweight pets, and those with heart or breathing problems need particular attention when assessing heat exposure. The Royal Veterinary College’s heatstroke guidance explains these risk factors.
Use the intake conversation and your observations to decide what needs further attention:
| Pet or situation | What to check before drying |
|---|---|
| Short-nosed dogs and cats | Ask about breathing difficulties and previous problems with heat or grooming. Seek veterinary guidance if suitability is uncertain. |
| Older pets or pets with limited mobility | Check whether the animal can stand, turn, and change position comfortably in the available space. |
| Overweight pets or pets with known medical conditions | Review relevant health concerns with the owner. Do not assume that lowering the temperature makes heated enclosure drying appropriate. |
| Pets unfamiliar with a drying cabin | Assess their response to the enclosure and equipment. Do not force the session if distress develops. |
| Pets with a history of anxiety during grooming | Ask what triggered previous reactions and which handling or drying methods they tolerated better. |
For a pet with known health concerns, seek veterinary guidance before using a heated enclosure. A groomer can observe behavior and adjust the grooming plan, but should not use a temperature setting as a substitute for medical assessment.
Watch quiet pets as carefully as active ones. Breathing, posture, and responsiveness are more informative than a lack of movement alone. Record any difficulty so the next appointment begins with that information rather than repeating an unsuitable routine.
When to Stop the Drying Session
Stop the session when the pet shows distress or the equipment behaves unexpectedly. Do not wait for the timer to finish or an alarm to confirm what you can already see.
| What you notice | What to do |
|---|---|
| Repeated attempts to escape, increasing agitation, or an inability to settle | Stop drying, safely remove the pet, and reassess the method before continuing. |
| Labored breathing, unusually heavy panting, excessive drooling, weakness, or collapse | Remove the pet immediately and seek urgent veterinary advice. Treat suspected overheating as an emergency. |
| An alarm, an unexpected temperature change, a stopped fan, or an unusual smell | Remove the pet and stop using the equipment until the cause has been assessed. |
If overheating is suspected, move the pet to a cooler, ventilated area, begin appropriate cooling, and contact a veterinarian immediately. The Royal Veterinary College provides heatstroke recognition and first-aid guidance. Do not put the animal back into the cabin to finish drying while arranging care.
For an equipment fault, follow the manufacturer’s shutdown and troubleshooting instructions. Avoid repeated restarts, and never bypass a warning or protective function to complete an appointment.
After the immediate situation is under control, record the settings, elapsed time, observed signs, and any alarm message. Inform the owner about concerns involving the pet and provide the equipment details to the service team when needed. These records help determine what should change before the next use.
Frequently Asked Questions
Q1: Is 104°F a Recommended Drying Temperature for Every Pet?
No. It is the upper setting available on these models, not a universal recommendation. Choose the drying approach according to the animal, the equipment instructions, and the operating conditions.
Q2: Will a Higher Temperature Dry the Coat Faster?
Increasing the temperature alone may not solve slow drying. Poor airflow, trapped moisture, and incomplete towel drying can all delay the process. Check those factors first. If the pet becomes uncomfortable, stop and reassess rather than increasing heat to finish sooner.
Q3: Can a Pet Drying Cabin Be Left Unattended?
No. Assign someone to monitor the pet and keep it readily accessible. Automatic controls cannot judge its behavior or comfort.
Q4: Which Safety Features Should I Check Before Buying?
Ask about temperature sensing, alarms, fault responses, ventilation, and door access. Also check what happens when the timer ends and whether filters and hair collectors are easy to maintain.
Conclusion
The F1, C7S, and CPlus share several control ranges, so temperature settings alone will not decide which one to buy. Check the usable space for the pets you handle, the installation requirements, and how easily you can reach the animal and clean the cabin.
Before ordering, confirm what happens when the timer ends or a fault occurs. If you can arrange a demonstration, ask to see the coat after drying and how much finishing work remains. These checks give you a more useful basis for comparison than capacity or power alone.
Whichever model you choose, plan for supervision throughout use. Automatic controls manage the equipment; the person responsible still needs to check the pet and decide when the session should end.